|
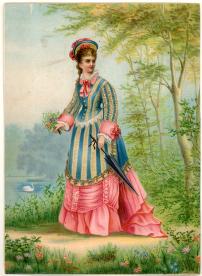
Advertising Card from L. A. Cook & Co.
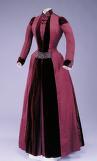
Dress
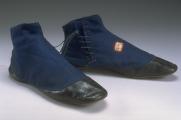
Girl's boots
Children's boots
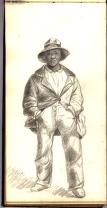
"Ellis, Field hand"
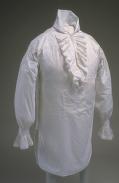
Man's Shirt
Wedding shoes
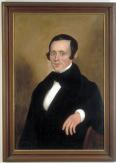
Nathaniel Lamson (1805-1866)
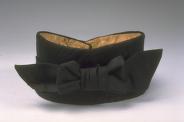
Stock (tie)
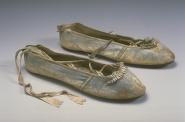
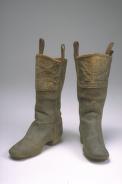
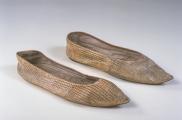
Woman's shoes
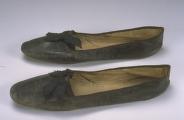
Men's pumps
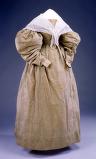
Wedding Dress
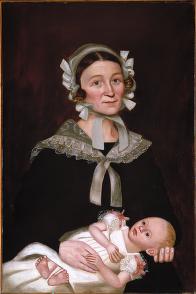
Melinda Prouty Lamson (1801-1874) and son, Nathaniel Lamson (1841-1907)
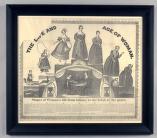
"The Life and Age of Woman"
|
Summary and Objective
By looking at portraits and studying clothing of the 1800's students will paint self-portraits of themselves dressed in early American costumes. Students will understand that clothing can influence how society views people.
Teaching Plan
Step 1.
Spend time looking at different portraits and images of clothing from early American artists. Ask students to focus their discussions on what each piece of clothing might have been worn for. What was the occasion for such an outfit? What do you think of the image? What can you tell us about the person(s) from their dress? Do the pieces of clothing have a practical purpose? What might the difference/similarities be between the clothing of the 1800's and today?
Some questions to ask the students.
1. Look at the portraits of "Ellis, Field hand" and the Advertising Card from L.A. Cook & Co. What do you see in each photo? Can you tell what each person may be doing? Do you think one has more or less money than the other, why?
2. Look at the images of the shoes and boots.
Do they look comfortable? What type of occasion might each shoe or boot be worn for? Do you think everybody wore these styles? Are the boys and girls shoes different or similar in style? Do they look like everyday shoes? What does each type of shoe tell you about the boy/girl who is wearing them? Have you seen styles like these today? Do we all have the same style shoe on today?
3. How many sets of clothing do you think someone from the 1800's had? When you see them in a painting can you tell if they are rich or poor, nice or mean, happy or sad based on what they are wearing?
4. Where might you look to find out more information about this style of clothing, shoes, or everyday clothing from the 1800's?
Step 2.
Discuss the meaning and value we put on clothing. Bring in samples of name brands, discount, hand-me-downs, worn-out clothing for the kids to look at. Explore the website by going to the Kids' Home section. Have the students work in pairs and click on 'Dress Up'. Every so often stop and discuss the differences between the amount of clothing worn in the past and the amount of clothing worn today. Questions to stimulate thinking might be: How might they feel wearing so much clothing? Would the clothing of the past be comfortable for the daily chores or routines of the day? Also note the type of the cloth used. Show and ask the students to discuss the textures, comfort factors, and durability of the fabrics used then and now.
Talk about the name brands put onto clothing of today. Designer choices, what do they tell about the person wearing them or how do we view this person? Discuss how in the 1800's there were no name brands, clothing was often made in the home. Could you tell the difference? What do we assume about a person who wears Nike's as opposed to Birkenstocks or Crocs or something homemade?
Step 3.
Explore the Dress Up activity, concentrate on the 1800's and 1900's. When discussing the clothing remind the students that people of this era did not have the technology or different types of material we do today. What they see was what was available. Discuss and maybe even have swatches of material available for touching. Some material to have: silk, cotton, burlap, velvet, course linen. How would each texture feel against your skin? Would it keep you warm or cool you? What type of quality would this fabric give to your garment?
Step 4.
If possible, contact your local historical society to come in with a program about 19th century clothing. Also consider contacting local museums to see if they have historical traveling kits for use. Play dress up if you have the opportunity to use reproduction clothing pieces from the 1800's. If not, have the students look closely at portraits and the clothing attached to this lesson. If the students have the ability to dress up, take photos of them dressed in their costumes for future reference. Once these photos have been developed, they will be used to create their self-portraits. Otherwise, have students choose a portrait from the past, copy it, but draw/paint their face in place of the original.
Step 5.
Give each student their photo or allow them to use images attached to this lesson. Each student should have one piece of large heavy weight white paper and pencils. Talk about the features of the face and how to proportion their image on the paper. Have them work on a rough sketch of their self portraits. Make sure they capture as much of the clothing shown in their drawings as well as their mood on paper.
Step 6.
Discuss the use of colors and patterns used in the clothing. Have them discuss how colors and patterns effect mood in a portrait. Provide the students with paint and have them paint their images.
Step 7.
Once the paintings have been completed go back to the original discussion about how clothing can influence how a person is depicted and viewed in society. Talk about modern style verses the 1800's.
|


